Ninja Foodie Corned Beef and Cabbage

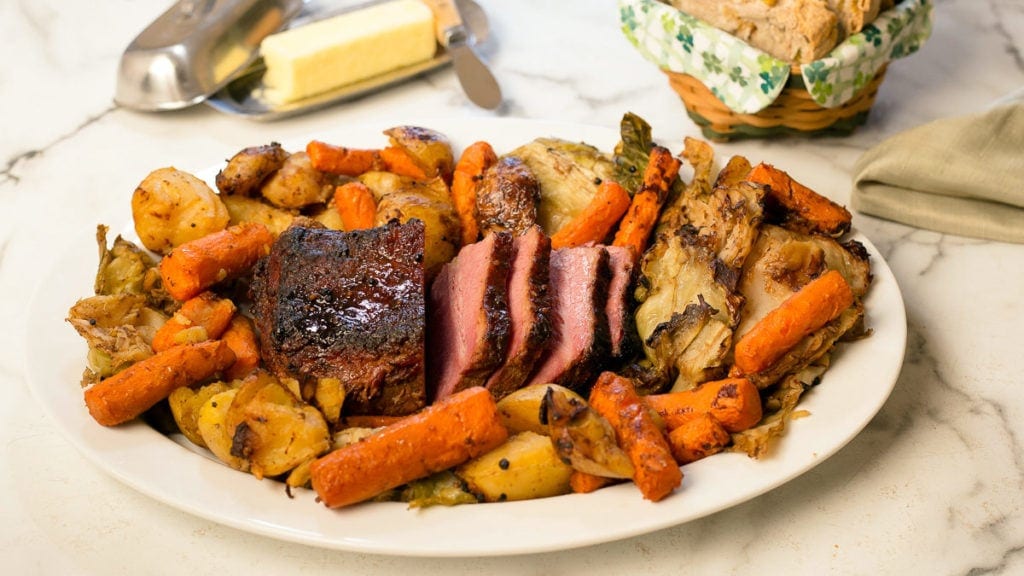 Corned Beef & Cabbage is one of those meals that seems so straight forward, yet is it? While it can be a simple meal to prepare, getting that corned beef cooked perfectly can be challenging. Not anymore! Just try this recipe for Corned Beef & Cabbage in the Ninja Foodi and you will see what I mean!
Every year I make corned beef & cabbage around St. Patrick's Day. It has been a family tradition for as long as I can remember.
Some years, the corned beef is perfectly tender and easy to cut and has a great flavor. Sadly, a lot of the years I've made it, it just hasn't turned out that great. Of course, this year I made my Corned Beef & Cabbage in the Ninja Foodi and it is the BEST corned beef and cabbage I have ever had in my life! Even my husband, who normally isn't really a fan, has raved about it! What's my secret? The Ninja Foodi of course! It takes the guess work out of making the perfect corned beef!
This post may contain affiliate links. If you make a purchase after clicking a link, I may earn a small commission. Thank you for your support!
Can I cook the corned beef, cabbage, carrots, and potatoes all at one time?
Yes and No. With my method for cooking Corned Beef & Cabbage in the Ninja Foodi, your complete dinner including the carrots and potatoes will be done at the same time; however, we will add the ingredients in stages to ensure everything is perfectly cooked.
I realize it's tempting to throw everything into a pot and boil or pressure cook away, but the end result will be overcooked vegetables and potatoes or an undercooked corned beef. Each ingredient has different cooking times and if you want to have the best Corned Beef & Cabbage dinner, you will want to follow my instructions for adding each ingredient.
What does "corned" mean in corned beef?
Don't laugh, but for many years I thought they used some sort of corn to make corned beef. Makes sense right? Why would they call it corned beef if corn isn't used? Turns out, no corn is used, but they call the rock salt "corns" of salt, hence the name corned beef. The "corning" process is just like the brining process. Salt is added to a liquid with spices and the brisket is submerged in the liquid and kept in a refrigerator for 10 days.
It's actually very simple to make your own corned beef and I have wanted to do this forever, but for some reason I haven't. Maybe next year! If you want to try your hand at corning your own brisket, here is a Corned Beef Recipe from Alton Brown. If you make one, please let me know how it turns out!
Quick Tip: If you want to make a corned beef that is better suited for slicing, use a top round roast! That's what the delis use.
What cut of corned beef should I get?
This is a great question and while you can use this recipe for Corned Beef & Cabbage in the Ninja Foodi with either cut, it's important that you understand the difference so you can choose the cut you will like the most. There are two different cuts: the flat cut and the point cut. These are made by cutting the large piece of brisket into two sections.
Both cuts vary in weight and I always suggest looking for a size that is at least twice the size as you want to serve. There is quite a lot of fat on a corned beef and the total weight is reduced quite a bit during cooking. I usually look for a 4 lb corned beef.
Flat Cut
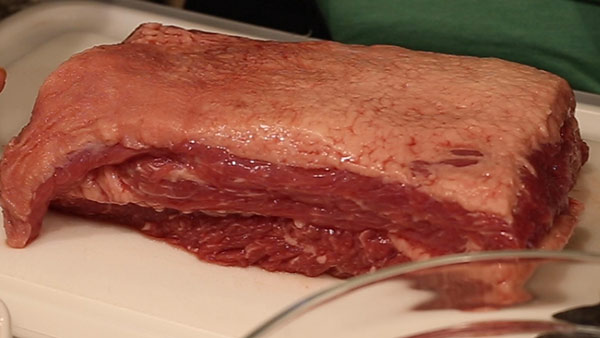
The flat cut is usually more uniformed in shape and it will say right on the package, "flat cut." There is a fat layer (called the fat cap) on the top and usually a layer of fat going through the middle. This cut is usually leaner as there isn't much marbling through the meat itself. The flat cut is better for slicing and using for sandwiches.
I prefer the flat cut and I have not noticed any lack of flavor when cooked correctly. I used the flat cut in this recipe for Corned Beef & Cabbage in the Ninja Foodi because I think it cooks more evenly and I like cutting slices when I serve corned beef.
Point Cut
The point cut is usually thicker on one end and tapers to a point at the other end. There is marbling throughout the meat, which makes this a fattier cut and more flavorful. Some say it is also more tender but, honestly, I have found it to be too stringy for my liking.
I always choose the flat cut, but either will work in this recipe. You choose the one you think you'll like the most. Just try to get one that is about 4 lbs.
Sorry, I don't have a picture to share of a point cut because I never buy them.
Suggestions from others who have made this recipe
Cassie suggests: "Retain the liquid from the veggies in step 6 and pour some back onto the meat at the end to make it extra moist and juicy! Yum!"
Alrighty, then... Let's get to making Corned Beef & Cabbage in the Ninja Foodi!
This is one time when preparing your ingredients ahead of time is not really necessary. In fact, I don't recommend cutting the potatoes until just before you add them to the inner pot of the Ninja Foodi. You don't want them to turn brown from being exposed to air.
The first thing to do is get your cabbage cut up and cored. Remove any dry or brown  leaves from the outside of the cabbage. Then sit the cabbage on a cutting board, stem side down. Check to see if it is stable. If it isn't slice a piece of the bottom off to make it sit flat so it doesn't wobble when you go to cut it.
Use at least an 8" sharp knife to cut from middle of the top down through the stem (core). The knife I like to use for this is the 8" Chef's Knife from Pampered Chef. I find that it is the perfect size and weight for me and stays sharp quite a while. Once you have two halves of the cabbage, place the flat side down and cut again through the middle of each half. Stand each quarter up and slice the core out. If you want to watch me do this, you can take a look at this video on YouTube: Corned Beef and Cabbage in the Ninja Foodi.
Once you have removed the core, slice each quarter in half width-wise to make 8 sections about the size of your palm.
 Remove the corned beef from its packaging and give it a quick rinse if you'd like. This will remove some of the brine. Be sure to keep the little seasoning packet.
Place one cup of water into the inner pot of the Ninja Foodi and arrange the cabbage pieces on the bottom. Add in spice packet, extra spices and ¼ cup of balsamic vinegar.
Set the corned beef on top and put the pressure lid on. Turn the valve to seal and set the Ninja Foodi to high pressure for 7 minutes.
When the time is up, immediate release the pressure. Remove the corned beef and set on a cutting board. Use a large plastic scoop like the Scoop N Drain to remove the cabbage and place it in a large bowl.
Place the corned beef on the rack in the low position and pressure cook on high for 45 minutes. When the time is up, allow the Ninja Foodi to naturally release its pressure for 10 minutes and then manually release the remaining pressure.
While the corned beef is cooking, make up your glaze. Combine balsamic vinegar, brown sugar, and mustard into a small mixing bowl.
Peel and cut the carrots into thirds. It is best to use the same size carrots when possible. I like to pick ones that are at least 1" in diameter. Smaller diameter carrots will cook faster and when mixed with larger carrots, they will cook unevenly.
Cut potatoes into quarters. I recommend using Yukon Gold potatoes, they hold their shape better and tend not to fall apart as much as Russet potatoes. You can also use the small new potatoes and I would recommend keeping them whole or just cutting them in half.
Place the carrots into the liquid in the inner pot and then put the potatoes in. Place 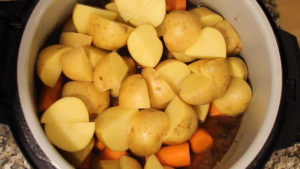 the corned beef on top. Set the pressure to high for 2 minutes and, when the time is up, allow the Ninja Foodi to naturally release the pressure for 10 minutes. Release any remaining pressure and remove the lid.
Remove the corned beef and set on a cutting board. Place the carrots and potatoes into a large bowl and cover with liquid from the inner pot.
Arrange the cabbage leaves around the side of the fry basket and place the corned beef in the middle, fat side up. If there is still a thick layer of fat, you can trim it up some. Just don't remove it all because we want it to crisp up.
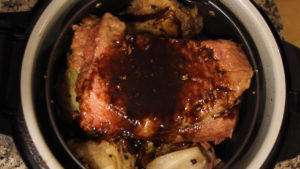 Pour the glaze over the corned beef and cabbage. Put the Tender Crisp lid down and set the Air Crisp function on 400° F for 20-25 minutes. I usually move the cabbage around a bit at the halfway mark to get more browning.
Remove the corned beef and place on a cutting board to rest for at least 15 minutes.
Add carrots and potatoes to the fry basket and set the Air Crisp function on 400° F. for 15 minutes. You can either do this in batches or all at once. I did it all at once (I did have a few veggies left over) and even though only the top got crisp, it was perfect for serving.
Slice the corned beef into ¼"-½" slices and arrange on a platter with veggies.
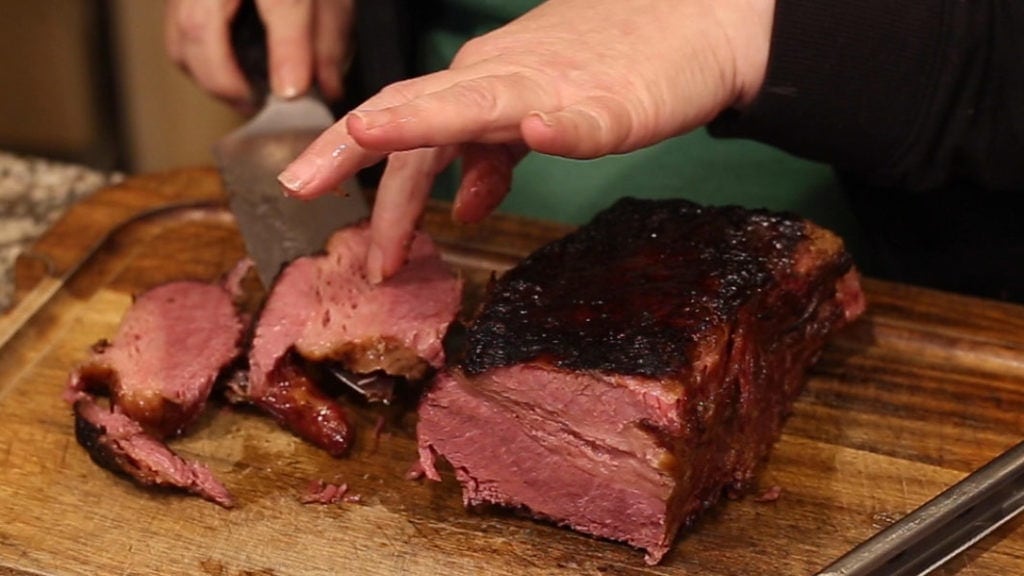
Serve & Enjoy!
ARE YOU MAKING THIS RECIPE? YAY! DON'T FORGET TO TAKE A PICTURE AND TAG US @THESALTEDPEPPER ON YOUR FAVORITE SOCIAL MEDIA CHANNEL!
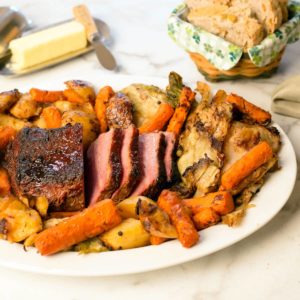
Corned Beef and Cabbage in the Ninja Foodi
There is something spectacular about corned beef & cabbage that is made in the Ninja Foodi. The corned beef is tender, melt in your mouth delicious and that glaze... Oh, that glaze! You simply have to try it!
Add to My Favorites Saved! Print Recipe Pin Recipe
Turn this on when cooking to prevent your screen from going dark
- 3 lbs cabbage
- 4 lbs corned beef with seasoning packet
- ¼ cup balsamic vinegar
- 1 cup water beer will work too
- 2 lbs carrots
- 2 ½ lbs potatoes Yukon Gold are preferred
Brown Sugar Glaze
- ¼ cup brown sugar
- ¼ cup balsamic vinegar
- 1 Tbsp mustard country style grey poupon
Extra Seasoning Blend
- 1 Bay Leaf
- 1 Tbsp peppercorn whole
- 1 Tbsp mustard seed whole
-
Cut the cabbage in to 8 sections. See post for more details. Add 1 cup of water and ¼ cup balsamic vinegar to the inner pot. Place the cabbage sections on the bottom of the inner pot. Add in the extra seasoning blend as well as the packet of seasonings that comes with the corned beef.
-
Place the corned beef fat side up on top of the cabbage. Put the pressure lid on and set the Ninja Foodi to high pressure for 7 minutes. When the time is up, immediate release the pressure.
-
Remove the corned beef and set on a cutting board. Remove the cabbage and put in a bowl. Place the rack in the low position into the inner pot and place the corned beef on the rack, fat side up. Put the pressure lid back on and set the Ninja Foodi to high pressure for 45 minutes. When the time is up, allow to natural release for 10 minutes. Remove the rack with the corned beef out and set to the side.
-
Peel and cut carrots into thirds. Cut potatoes into quarters. See post for details. Place the carrots into the bottom of the Ninja Foodi and place the potatoes on top. Set the corned beef on top of the potatoes and put the pressure lid on. Set the pressure to high and cook for 2 minutes. All the Ninja Foodi to naturally release its pressure for 10 minutes.
-
Make the glaze: combine the ¼ cup of balsamic vinegar, brown sugar, and mustard in a small bowl.
-
Remove the corned beef and set to the side. Remove the carrots and potatoes and place in a large mixing bowl. Pour the juice from the inner pot into the bowl to keep the carrots and potatoes warm.
-
Place the cabbage around the sides of the fry basket. Place the corned beef in the center. Pour the glaze over the top. Set the Air Crisp function to 400° F and Air Crisp for 20-25 minutes. Remove corned beef and set on a cutting board to rest for 15 minutes.
-
Move the cabbage around a bit and add in potatoes and carrots to the air fry basket. Air Crisp on 400° F for 15 minutes.
-
Slice the corned beef against the grain. See video for more details. Serve with cabbage, potatoes, and carrots. Enjoy!
Calories: 668 kcal Carbohydrates: 49 g Protein: 40 g Fat: 34 g Saturated Fat: 10 g Cholesterol: 122 mg Sodium: 2911 mg Potassium: 1960 mg Fiber: 11 g Sugar: 19 g Vitamin A: 19120 IU Vitamin C: 146.4 mg Calcium: 182 mg Iron: 10 mg
Let us know how it was!
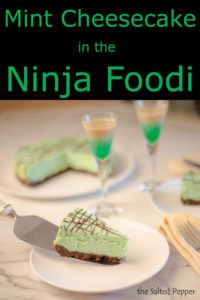
Are you looking for the PERFECT dessert to serve after your Corned Beef and Cabbage? Give this Mint Cheesecake a try!
YOU CAN FIND THE SALTED PEPPER RIGHT HERE ⇓⇓⇓⇓
Source: https://thesaltedpepper.com/corned-beef-cabbage-in-the-ninja-foodi/
0 Response to "Ninja Foodie Corned Beef and Cabbage"
Post a Comment